Create Python Virtual Environment in Windows [2022]

A Virtual Environment, put simply, is an isolated working copy of a Python environment that allows you to work on a specific project without worrying about any dependencies issues with other projects.
Why do we need a Virtual Environment?
For example, you are working on project A, which requires Python’s library A(site package) version 1.0, while another project, B, requires the same library A but with newer version 1.3. In such situations, a virtual environment can be beneficial to maintain the dependencies of both projects.
This is one of the most important tools that most Python developers use.
When and where to use a virtual environment?
Let’s first understand where the Python package is stored in your system after the installation and how the virtual environment works.
Python packages are stored in a few different places.
To find out, Check the following:
- Open the Python interpreter or command prompt/terminal
- Try this 👇
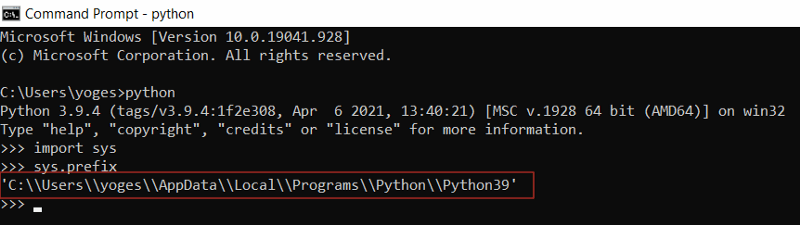

It is important to know such details because every project on your system will use these same directories to store and retrieve site-packages (third-party libraries).
So what is the big deal?
It might not be for system packages (packages that are part of the standard Python library), but it does matter a lot for site-packages.
Let’s take the same example again and understand Why? and How?
For example, you are working on project A which requires Python’s library A(site package) version 1.0 while another project B requires the same library A but newer version 1.3
This is a real problem for Python since it can’t differentiate between versions in the site-packages directory. So both v1.0 and v1.3 would reside in the same directory with the same name.
Since projects are stored according to just their name, there is no differentiation between versions. Thus, both projects, Project A and Project B, would be required to use the same version, which is unacceptable in many cases.
This is where virtual environments and the virtualenv/venv tools come into play…
The great thing about this is that there are no limits to the number of environments you can have since they’re just directories containing a few scripts.
Steps to create a Virtual Environment
Step 1: Create
To create a virtual environment, decide upon a directory where you want to place it, and run the venv module as a script with the directory path:
Note: If you are using Python 3, then you should already have the venv module from the standard library installed.
From here on out, we’ll assume you’re using the newervenvtool, since there are few differences between it andvirtualenvwith regard to the actual commands. In reality, though, they are very different tools.
> python3 -m venv [Virtual Environment Name]Example, > python3 -m venv sample_venv
Note: By default, this will not include any of your existing site-packages.
Here python -m flag stands for the module, i.e. some modules have main entry points and in order to run this has to be used.
This will create the sample_venv directory if it doesn’t exist, and also create directories inside it containing a copy of the Python interpreter, the standard library, and various supporting files.
Step 2: Activate
Before we can start installing our packages in our virtual environment, we need to activate the environment. Remember to activate the relevant virtual environment every time you work on the project. This can be done using the following command:
On Windows :
> .\[Virtual Environment Folder Name]\Scripts\activate Example, > .\sample_venv\Scripts\activate
On Unix or Mac :
> source[Virtual Environment Name] /bin/activate Example, > source sample_venv/bin/activate
Once the virtual environment is activated, the name of your virtual environment will appear on the left side of the terminal. This will let you know that the virtual environment is currently active.

Deactivating the virtual environment
(sample_venv) C:\Users\yoges\Python_venv> deactivate
Create a Virtual Environment using Conda
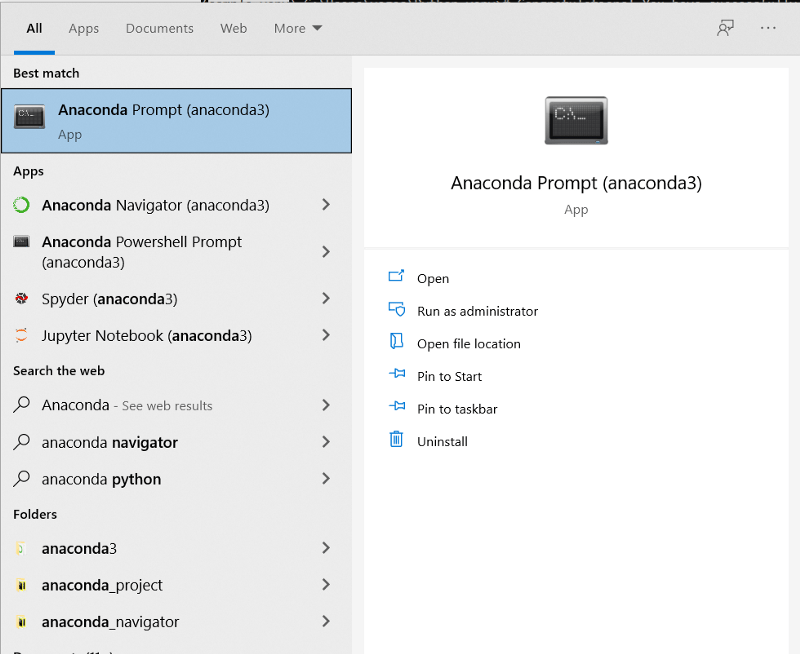
Step 1: Open Anaconda prompt
Tip: Here’s how you open Anaconda prompt:
- Press the ⊞ Win key.
- Type
Anaconda Prompt. - Select Open↗
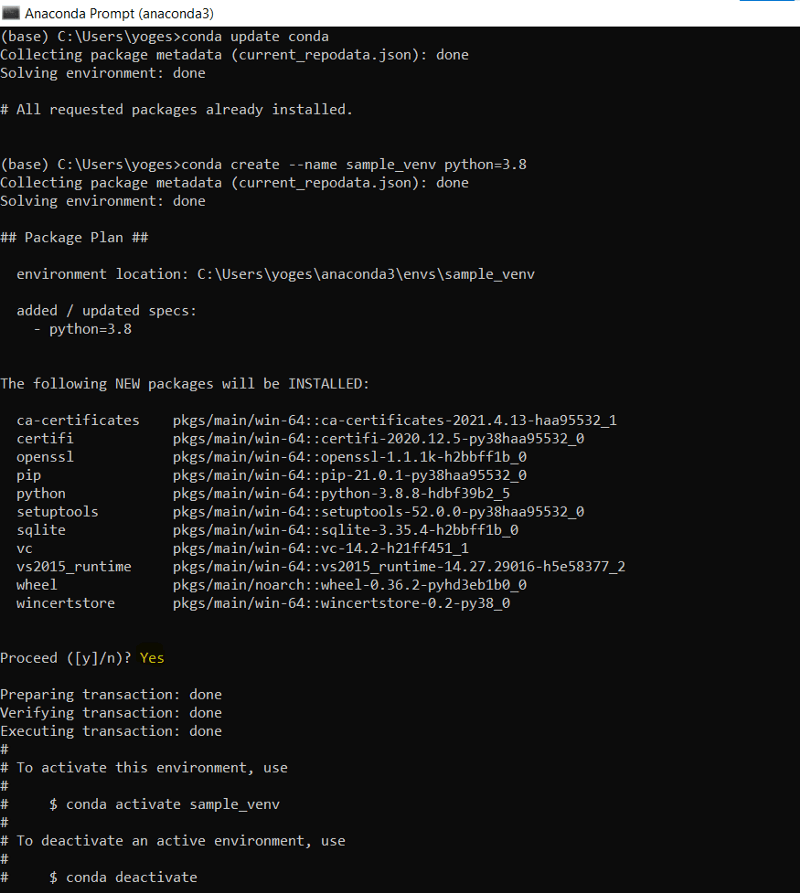
Step 2: Check Conda is installed in your path
$ conda -V
Step 3: Check if Conda is up to date
$ conda update conda
Step 4: Create a Virtual Environment
$ conda create --name [Virtual Environment Name] python=[Version you want to install] Example, $ conda create --name sample_venv python=3.8
The above command means, Create a virtual environment using the conda create command whose name is sample_venv (you can choose any name) that runs on python version 3.8
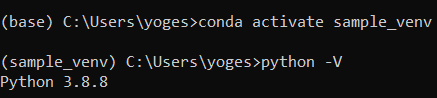
Step 5: Activate the environment
$ conda activate sample_venv
Step 6: Deactivate the above environment once your work is done
$ conda deactivate
HAPPY CODING !!!
If you like what we do and want to know more about our community 👥 then please consider sharing, following, and joining it. It is completely FREE.
Also, don’t forget to show your love ❤️ by clapping 👏 for this article and let us know your views 💬 in the comment.
Join here: https://blogs.colearninglounge.com/join-us