Getting Started With Kaggle for Beginners in Data Science

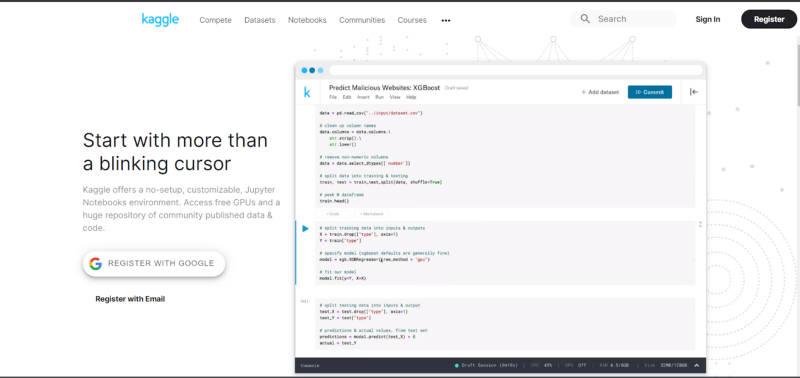
Data Science is a field that is evolving rapidly, with frameworks, libraries, and sophisticated toolkits being released frequently. To keep up with this ever-changing field of research and development, there is no other place than Kaggle to hone your skills. From industrial-strength machine learning and AI to cutting-edge research, Kaggle is a one-stop-shop that contains all the resources from notebooks, datasets, competitions, exclusive kernels, and ample scopes to learn through community discussions.
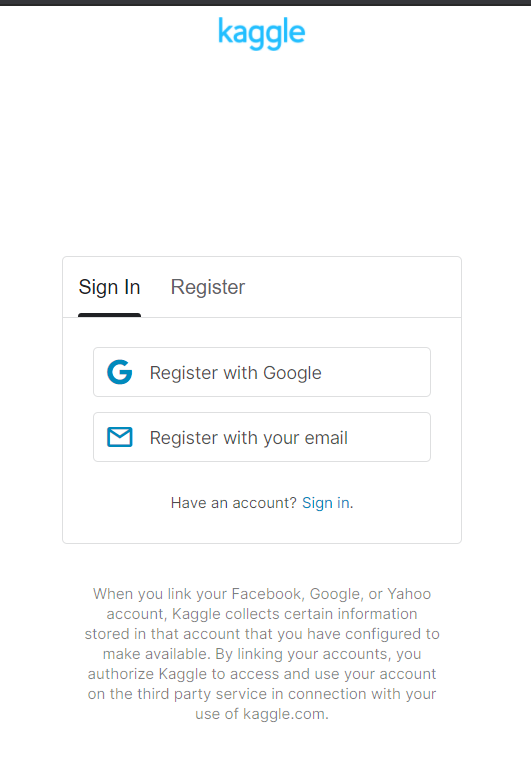
First, we have to register and create an account. This can be done by clicking on the “Register” option in the upper right-hand corner.
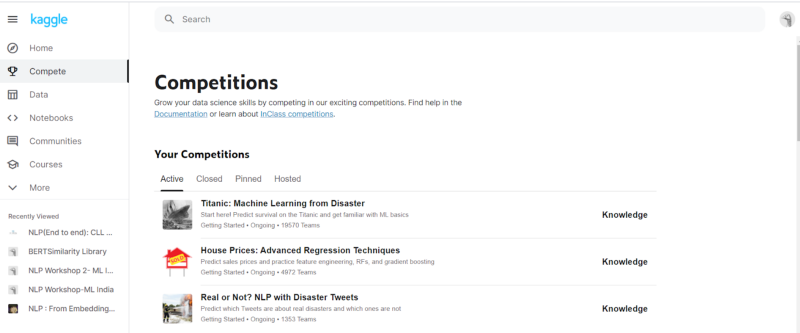
Once we have registered, we have to select a problem statement that we would like to work upon. We can go to the “Home” page, and on the left-hand panel, we can see a list of options, as shown below:

The options are as follows:
- Compete: This contains the list of different competitions in which we can take part in. These contain the competitions which are currently ongoing, as well as past competitions, including competitions which were participated by us.
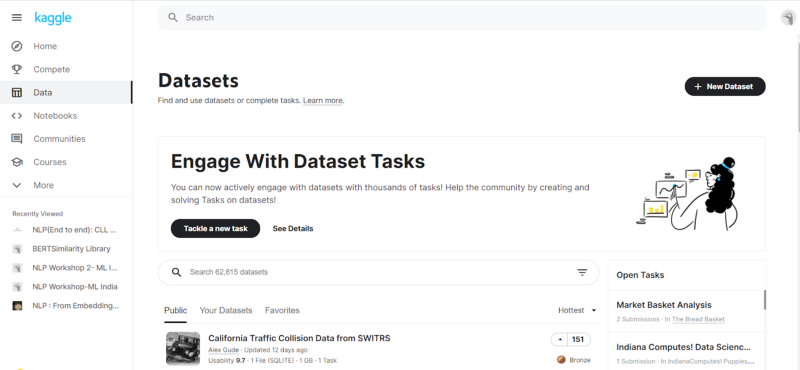
- Data: This contains the different datasets present inside the Kaggle universe, which we can play with. We can add a new Dataset with the “+ New Dataset” option in the upper right corner, or we can tackle an existing problem to try our approach.
- Notebooks: This contains the different notebooks which are rated based on different factors, the most prominent being “hotness,” which implies the traction a particular notebook got in the community with respect to likes. There are options to view your own Notebooks, including private notebooks (accessible only to you), along with an option to add a Notebook in the upper right corner.
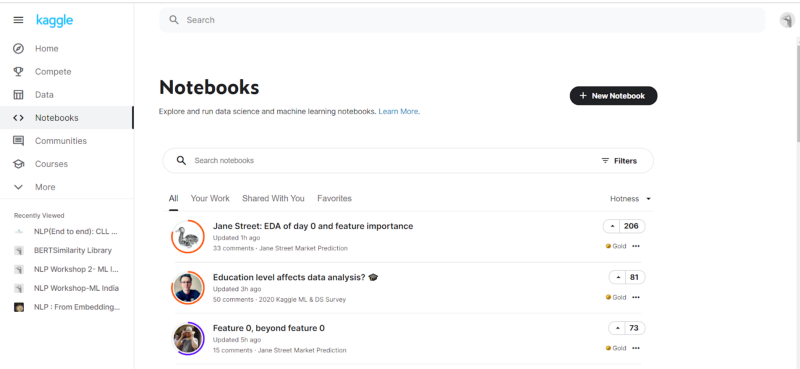
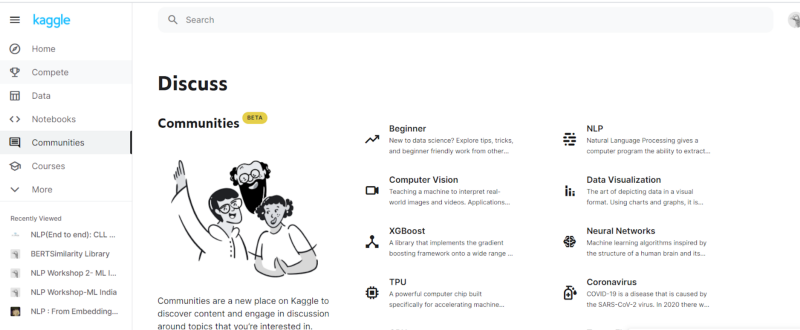
- Communities: This section contains the communities we can be a part of based on our preferences and skill level. The community is a great place to learn new concepts as well as share knowledge about any new research, best practices, or just contribute to any kernels or questions.
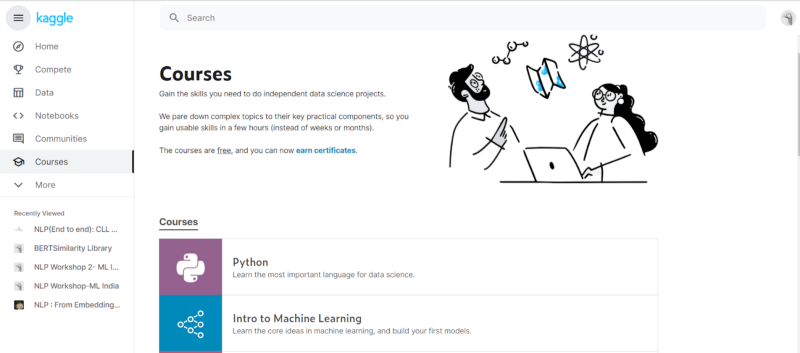
- Courses: Another important part of Kaggle is this section which contains different courses across different paradigms of machine learning, from Deep Learning to Computer Vision, Geospatial Analysis to Natural Language Processing and AI.
Let us start creating a new notebook from a problem statement.
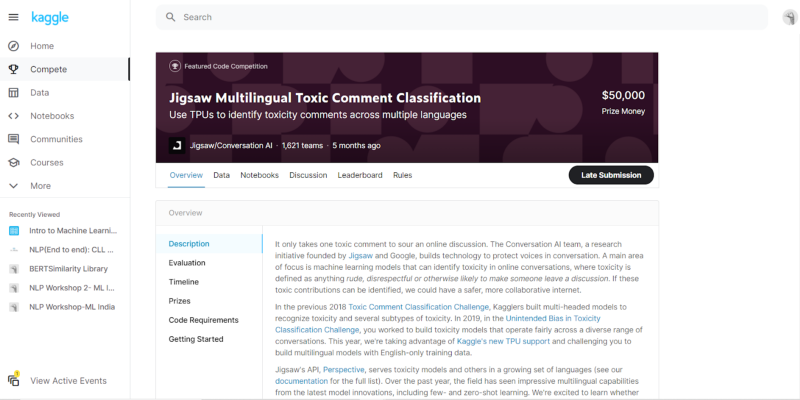
- Choose a Problem Statement: The first step, in this case, is to choose a problem statement. We will be working with an NLP classification project for our use case- “Jigsaw Multi-lingual Toxic Comment Classification Contest.”
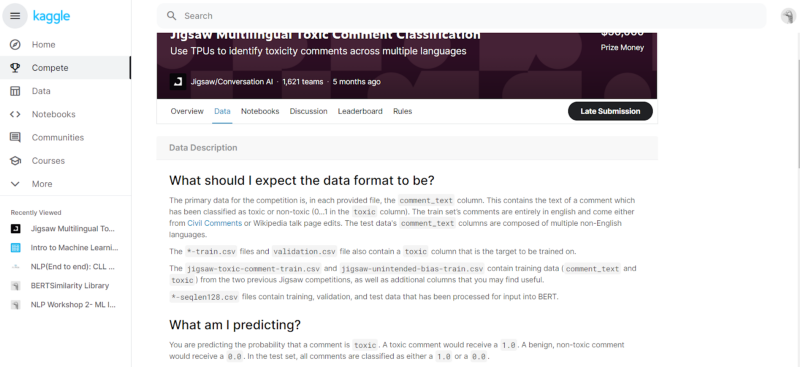
- Understanding the Data and Options: The second step is to understand what the tabs specify. There are 6 tabs :
- Overview: This contains the overview of the Problem statement, including the Description, Evaluation criteria, and Timeline of the challenge. It also contains features like Prizes, Code Requirements, and a Getting Started option for a general introduction.
- Data: This is the most important part of the challenge. The data part contains the individual details of how the input data is present for our analysis. Generally, these contain “train.csv,” “test.csv,” and “submissions.csv” data files. Most of the data in Kaggle challenges in the form of “.csv.” This section also contains the required format for the output required to be submitted. Before starting the project, a very thorough understanding of the data is required.
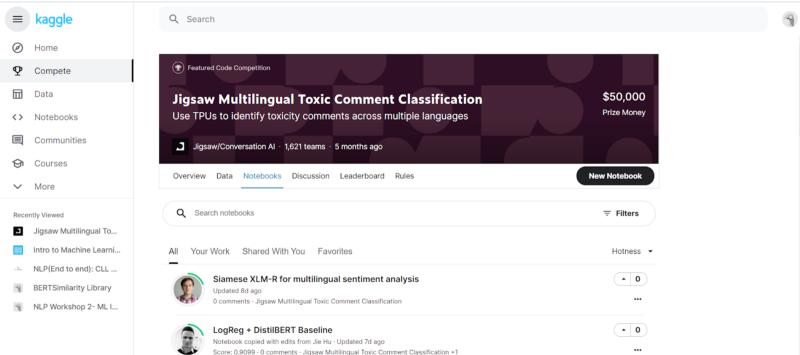
- Notebooks: This contains the Notebooks submitted by everyone participating in the challenge of contributing to the project. Just as in the Notebooks section in Home, the notebooks are sorted based on “hotness” (number of likes), and there are options to change the filter. We can also view and work on our notebooks. Initially, when we create a notebook, we create a private notebook, which is viewable by us only. Once we have shared it publicly, can the notebook be viewed by all?
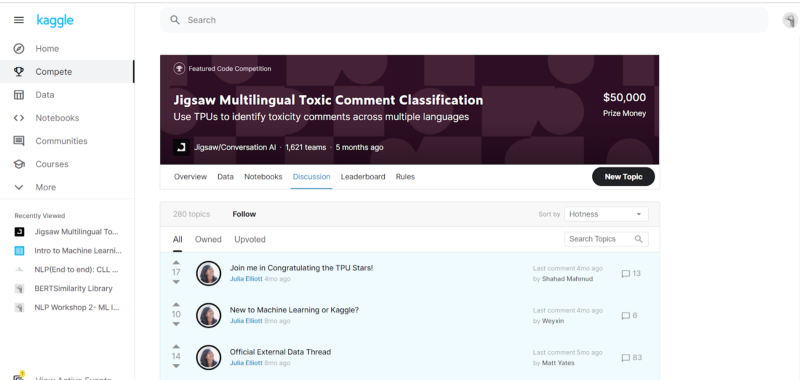
- Discussion: This contains the discussion panel where the community posts all the discussions about the challenge. It is a good practice to engage in discussions, appreciate other Kagglers’ work, and build upon our knowledge.
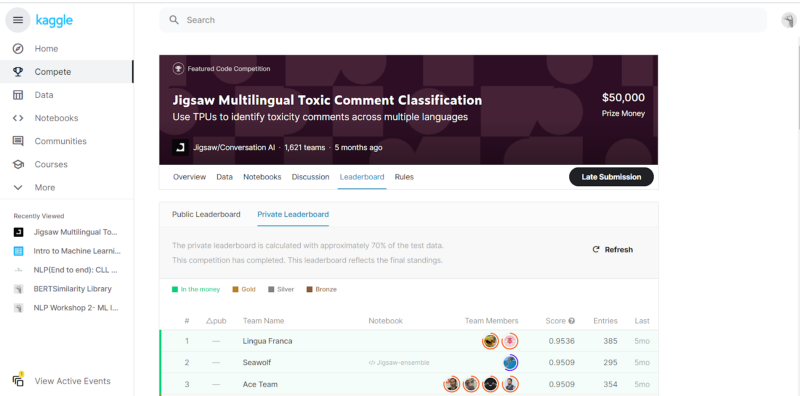
- Leaderboard: This contains the entire leaderboard of the challenge with the ranking, the scores of each team, and the team details.
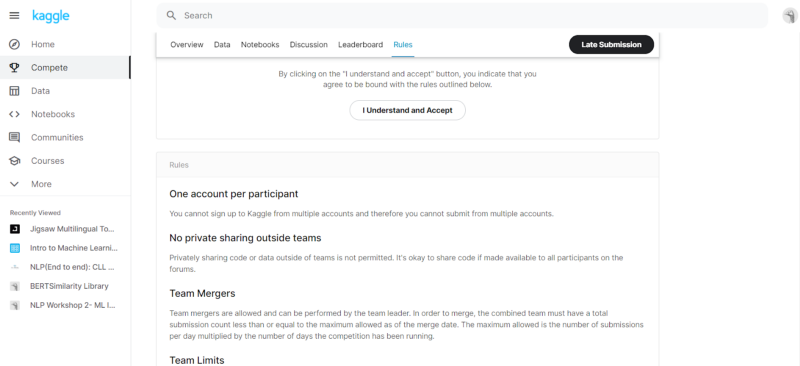
- Rules: This contains the rules of the challenge and should be read before starting the challenge. We have to click on “Understand and Accept ” before starting the competition.
- Creating a Notebook: This is the next step for starting our work. We have to navigate the Notebooks tab and click on “New Notebook” in the upper right-hand corner of the page. On clicking it, we will have to accept the Competition Rules, which come as a pop-up on the screen as shown below:
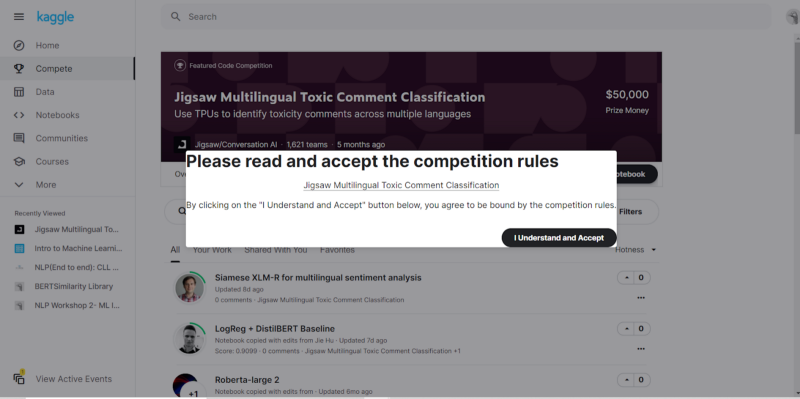
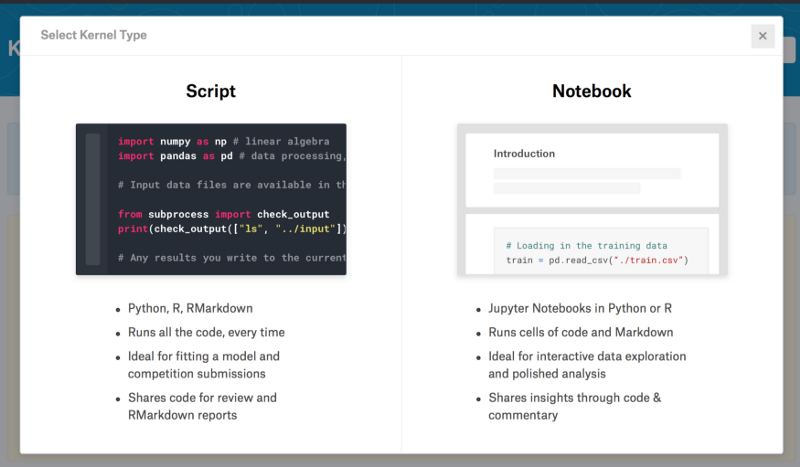
On clicking “I understand and accept,” we will be navigated to a new Kernel. Here there is a selection that we have to make based on which language we are going to work on. The languages are R and Python, and since we will be doing it in Python Notebook (as opposed to Python Script), we will go ahead and click that option.
Now we have successfully created our Notebook, which appears as follows:
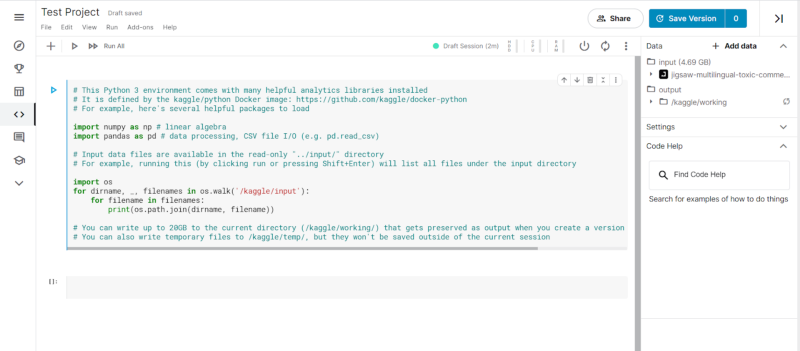
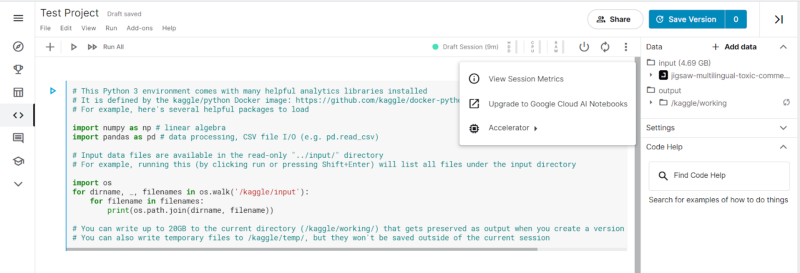
- Setting up Runtime Environment: The next step is to set up runtime environments. In the panel containing the demarcations for CPU, GPU, and TPU along with a marker (green) which states the status of the current notebook kernel. If the status is green, it implies that the kernel is ready and connected to the Python3 runtime. Since Kaggle Notebooks are run on the cloud, hence each Notebook has a time limit of 9 hours. When we click those demarcations, we get to see the status of our runtime environment.

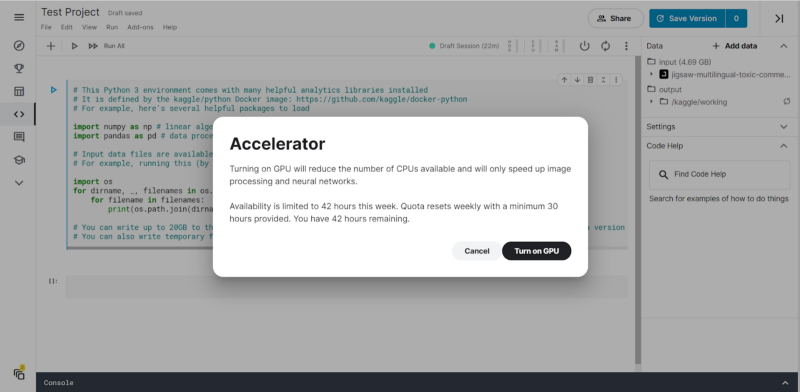
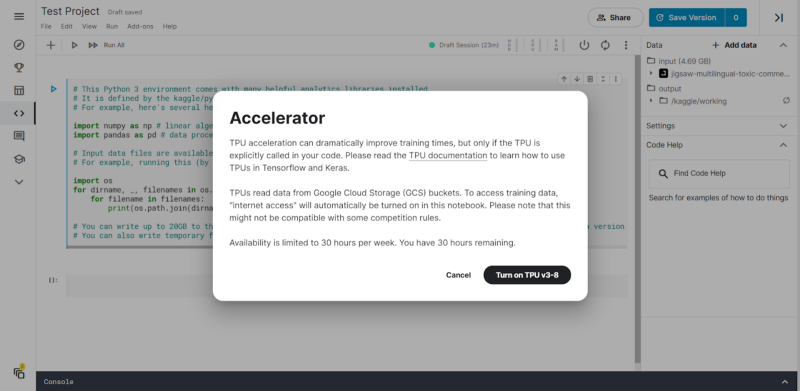
The Power Button controls the kernel power if we would like to shut down the kernel. The Restart Session Button adjacent to it restarts the kernel. The slider option beside it, when clicked, opens a drop-down showing the Session metrics, Accelerator, and an option to upgrade the notebook to Google Cloud. In the accelerator option, we can choose GPU or TPU v3–8
On clicking on either GPU or TPU v3–8, we will be prompted to see the hours we have at our disposal of using the GPU or TPU. In our case, we see that we have 42 GPU runtime hours at our disposal.
For TPU usage, we have 30 hours remaining for a week. It is also mentioned that TPUs read data from Google Cloud Storage (GCS) buckets. Since TPUs are effectively useful for deep learning with Tensors (Tensorflow), this speeds up the training of large training sets with huge neural network architectures.
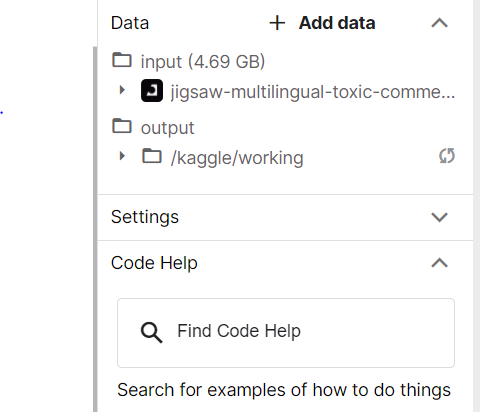
- Data For the Challenge: Data mentioned in the “Data” tab on the Challenge page is already present in the notebook in the right-hand panel. This is shown below:
Now, we may include more datasets in our Notebooks as well. This can be done by clicking on the “+ Add Data” tab on the right. On clicking it, we have lots of options to choose from.
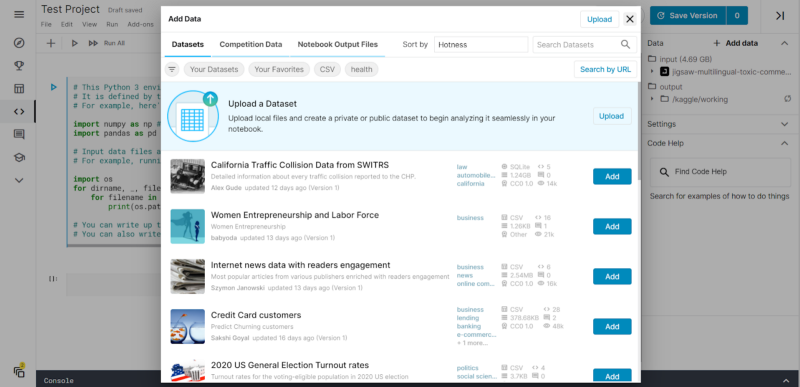
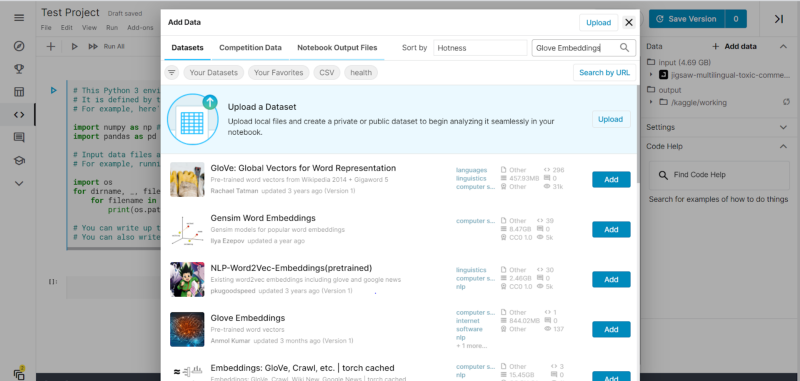
We can use the Datasets provided in Kaggle, Competition Data, or Notebook Outputs. We can also leverage the search option to search for any particular file. For instance, we are searching for “Glove Embeddings” to be used in our NLP classification task.
We can also upload data from our laptops or devices by clicking on the “Upload” option in the upper right corner.
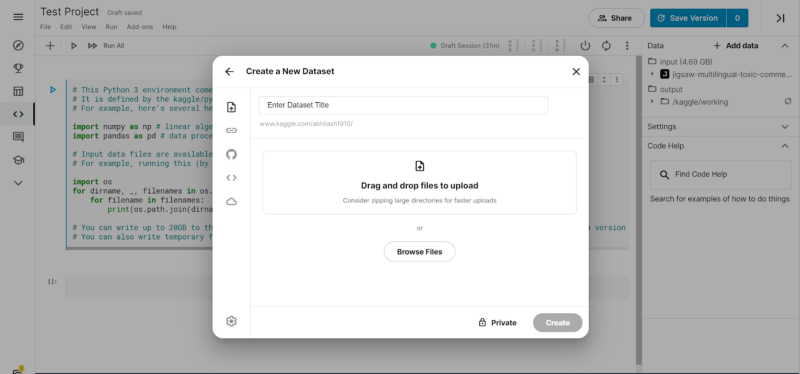
We can choose from different options — Upload from the local machine, upload from Github, or by using URLs or from Google Cloud as well.
- Running the Notebook: For using the Notebook, we have to write in Python code in the space provided. There can be 2 code blocks — code or markdown. The Markdown is provided for better documentation of the code and can be selected by the “Code” or “Markdown” option present below each output tab.

Kaggle provides the input files of the challenge by default, and we can just run the first cell in the Notebook by pressing “Ctrl+Enter” or using the Run option from the Menu Bar. The Menu Bar also contains different options like File, Edit, View, Run, Add-ons, and Help for different use cases.
On running the first block, we can see the input files in the output of the Notebook cell.
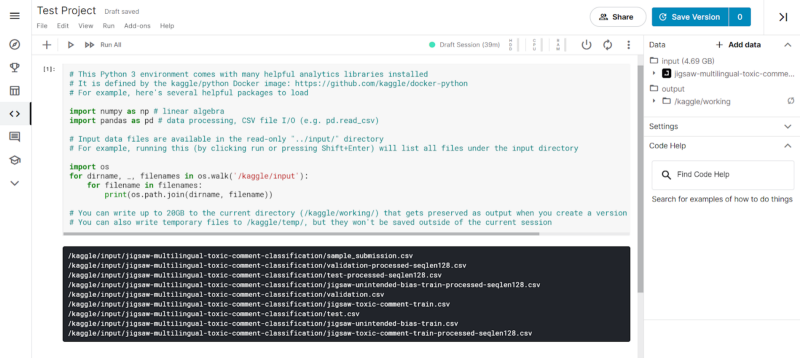
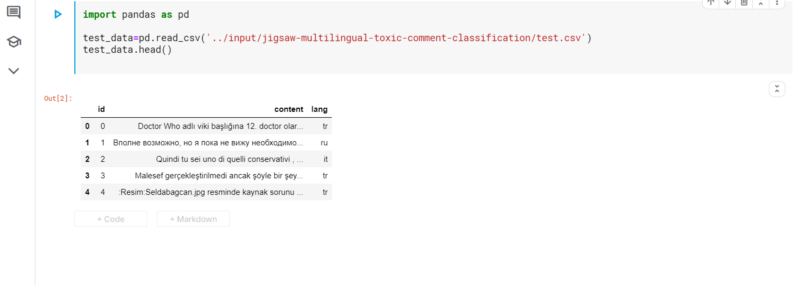
To access any input file, we have to specify the file’s relative path. The general syntax is “../input/<filename>”. In our case, we can visualize the “test.csv” dataset using the following code line.
Now that we can access the data as well as understand the runtime environment, we will venture into the last part- sharing the notebook with the community.
- Sharing the Notebook: After we have created our code and completed our Notebook, we can click on the “Save Version.”
Tab present in the upper right-hand corner. On clicking, a pop-up is generated as follows:
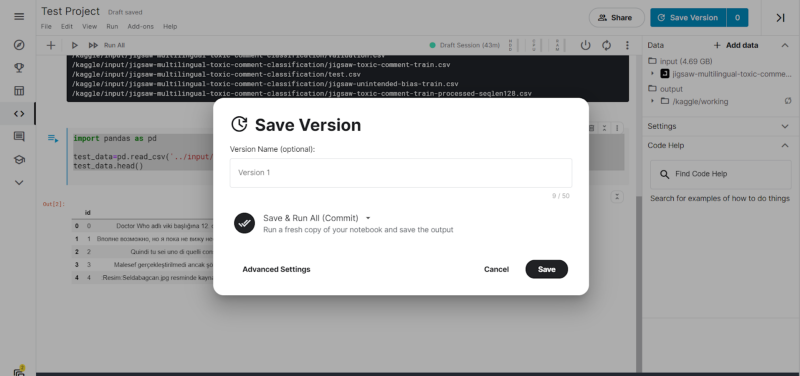
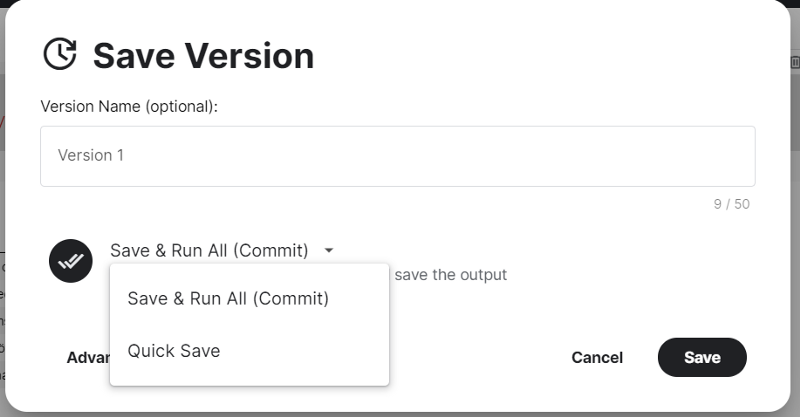
There are options to select the Version name as well as choose how to save the image. There are 2 ways:
- Save & Run All (Commit): This allows the Notebook to re-run all the cells and save them.
- Quick Save: This saves the current version of the Notebook as it appears.
The option appears as shown in the figure below:
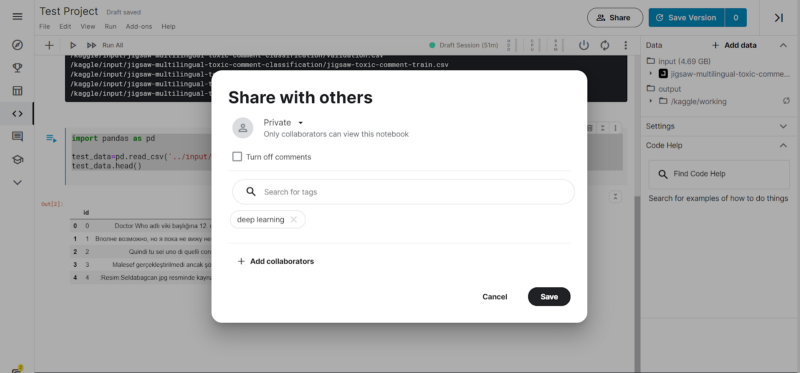
To share the Notebook with the community, we have to click on the “Share” button adjacent to “Save Version.” We get a pop-up where we can choose to keep the notebook in “Private” mode or in “Public” mode. In Private mode, the Notebook is not publicly shared. The Notebook is shared with the Apache 2.0 license in the Public mode. There are options to add tags and add collaborators as well.
- Conclusion and Final Steps: Our notebook is now shared with the community; people can see the code and the documentation. Upvotes are received when the kernel and the notebook provide significant insights into the data. It is always recommended to document the Kaggle kernel well, which will help everyone collaborate and improve the notebook as well as offer helpful feedback and medals. It is also encouraged to participate in community discussions.
That concludes the entire pipeline for starting with Kaggle notebooks.
Hopefully, this blog provides an insight into the beauty of Kaggle kernels and Kaggle in general. Kaggle is the best place to start learning and honing our skills in data science, analytics, machine learning, and AI, and I hope this blog helps enthusiastic Kagglers to get started with their own Notebooks!
If you like what we do and want to know more about our community 👥 then please consider sharing, following, and joining it. It is completely FREE.
Also, don’t forget to show your love ❤️ by clapping 👏 for this article and let us know your views 💬 in the comment.
Join here: https://blogs.colearninglounge.com/join-us