Introduction, Installation, and Setup- Jupyter Notebook

When starting in data science, one of the most typical roadblocks is deciding which tool or environment to adopt when working on your data science or machine learning projects. As you might think, yes, there is no shortage of alternatives available — some may be expensive, such as PyCharm Enterprise, while others may be free, such as Google Colab — and the selection may be overwhelming for a newcomer.
However, if there is one tool that every data scientist or data enthusiast should use or be familiar with, it is Jupyter Notebooks, an IPython Notebook offshoot project!
To start with, IPython was created by Fernando Perez in 2001 as an optimized Python interpreter to offer a web-based interactive computational environment.
The IPython notebook, a web-based interface to the IPython terminal, was introduced at the time. Later, as a spin-off project from IPython, Project Jupyter was born.
IPython was retained as a Python shell and kernel for Jupyter, but the notebook interface and other language-independent IPython components were renamed Jupyter. Jupyter is language-independent, and its name alludes to the core programming languages it supports: Julia, Python, and R.
Jupyter Notebook is largely used for data analysis, data visualization, and further interactive, exploratory computing.
JupyterLab is a next-generation user interface for notebooks. It has a modular layout allows you to open many notebooks or files (such as HTML, Text, and Markdowns) as tabs in the same window. It provides a more IDE-like experience.
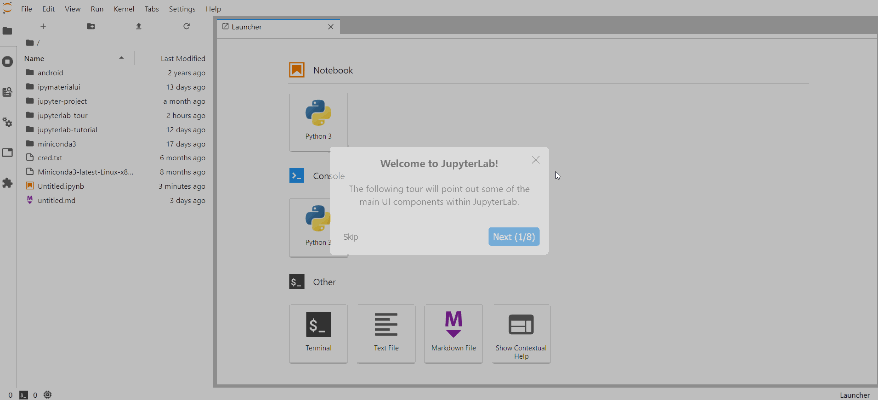
JupyterLab has additional capabilities and an improved interface that can be expanded through extensions, however, it is recommended for novices to start with Jupyter Notebook rather than JupyterLab.
At the same time, Binder is a tool for sharing Jupyter Notebooks in an executable environment and is also similar. Jupyter notebooks in Binder are interactive, allowing anybody to engage with our code and make changes and reproducible, allowing anyone to execute our code and get the same desired results. It resembles a Jupyter notebook and is powered by Binderhub, a server platform that builds interactive computational environments in the cloud for anybody to use and edit.
For an absolute beginner in Data Science who also might have come across Anaconda but got confused with Jupyter Notebook. It is a Python prepackaged distribution that includes several Python modules and packages, including Jupyter. It is quite ubiquitous in the Data Science and development domains.
Why Jupyter Notebooks Are So Popular Among Data Scientists? OR Why Should Data Scientists Use Jupyter Notebooks?
The answer is that the most common use cases for Jupyter Notebook are for data science, mathematics, and other research projects involving visualizing data or formulas.
Jupyter is a Python environment that allows you to operate in a virtual “notebook” and is extremely useful in scientific computations. It gives you a way to combine code, images, plots, notes, etc., so you can tell a story–how did I draw this conclusion from that data, and so on.
During the majority of the stages of a data science project, it saves a significant chunk of time!
Furthermore, because major cloud providers have adopted the Jupyter Notebook or derivative products as a frontend interface for cloud clients, the Jupyter Notebook has become a prominent user interface for cloud computing. Amazon’s SageMaker Notebooks, Google’s Colaboratory, and Microsoft’s Azure Notebook are some examples.
And today, Jupyter has evolved into an ecosystem with numerous alternative notebook interfaces such as JupyterLab, interactive visualization libraries, and notebook-compatible tools.
Installation
There are multiple ways you can install Jupyter Notebook in your system.
- Through Python distribution using Anaconda
- Through default installation(Pythonic way) using PIP
Installation using Anaconda
Anaconda is the second most popular Python distribution after ActivePython from ActiveState. Conda is Anaconda’s installer tool, which you might use to install a third-party package. However, Anaconda comes preloaded with several scientific libraries, including the Jupyter Notebook, so you don’t need to do anything other than installing Anaconda.
Windows
To install Anaconda on your machine, follow the instructions from the blog below.

Download, Setup & Install Python on Windows[2022]Installing or updating Python on your system is the first step to becoming a Python developer. There are many ways you can get started with setup and installation: you can download official Python distributions from Python.org, install from a package …
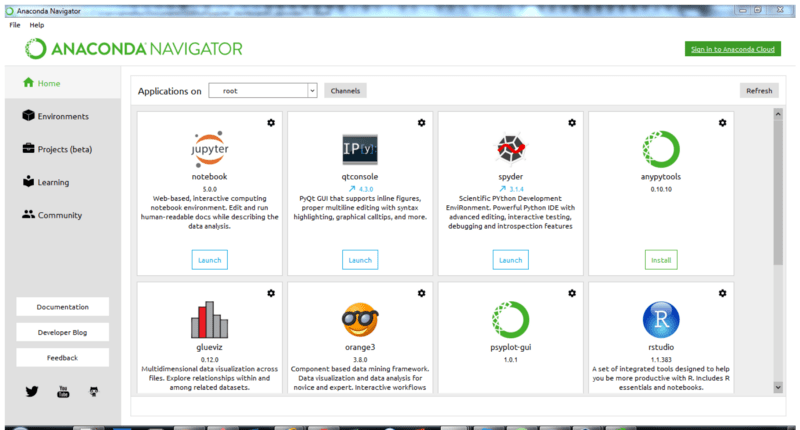
After installing Anaconda and launching Navigator, you’ll see a dashboard with a list of available programs. Anaconda has tools for installing a variety of applications, including Jupyter. Jupyter will be immediately available to you after Anaconda has been installed.
Mac
Follow the below tutorial to install Anaconda on Mac OS
Linux
To install Anaconda on Linux, follow the instructions below. Make sure to follow the prerequisites based on the flavor of your Linux.
After successful installation, you should be able to see the home screen of Anaconda as shown below.
Default installation(Pythonic way) using PIP
The Jupyter Notebook is not included with the default version of Python, so you will need to install it if you wish to try it out.
Windows/Mac/Linux
If you are using Linux, ensure the PIP package is up to date. Execute the following command to update it.
Make sure to use sudo if you are not a superuser(admin)
> pip3 --version > sudo apt-get update > sudo apt install python3 - pip > sudo -H pip3 install jupyter
In the command prompt type the following command.
> pip3 install jupyter
Now that Jupyter is installed, let’s discuss how to leverage it. To get started, open the anaconda terminal, navigate to a folder of your choice, and then enter the command below:
> jupyter notebook
This will launch Jupyter and open your default browser (or create a new tab) to the following URL: http://localhost:8888/tree
Your browser should now seem as follows,

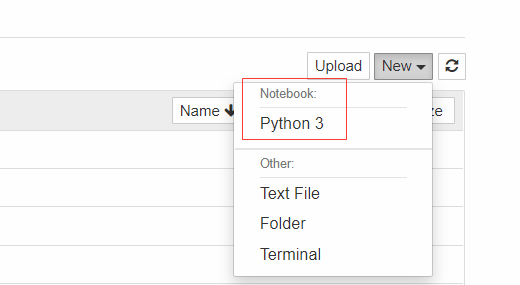
Please make sure that the above command runs the Notebook server, now, to create a notebook, follow the steps.
- Click the New button (top right) to bring up a list of options.
- Select the version of your choice. Here it is Python 3.
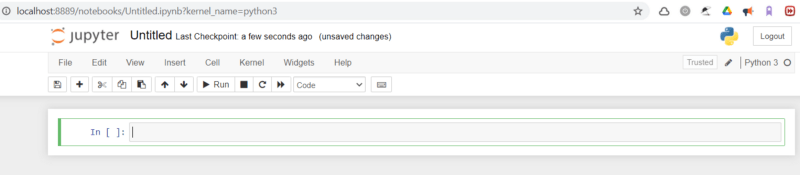
Your empty notebook will look like this,
Setup
Changing the Default Theme of Jupyter Notebook
Are you tired of the old light default theme of Jupyter notebooks and want to experiment with dark themes?
Using the jupyter-themes package, you can accomplish it in two lines of code. You might be able to use conda to install it. Otherwise, you will need to use pip.
## Install it with
conda
conda install -c conda-forge jupyterthemes## Install it with
PIP
pip install jupyterthemes
Once installed, you can view a list of (currently 9 are available) themes and apply one of your choices.
## you can also use the same command with ‘!’ in the beginning on the notebook to check the list:
[ ] !jt -l
To load a theme, finally, reload the page.
By default, the theme hides the toolbar and the name of the notebook. However, you may change it with the following command:
jt -t grade3 -T -N (to display the toolbar and notebook’s name)
Now, for those who want to restore the original theme, you can do by running: jt -r
You need to restart Jupyter the first time you do it; a later refresh is enough to enable the new theme.
or directly from inside the notebook !jt -r
Increasing cell width of the Jupyter Notebook
You might have a high-resolution screen, so you would like to expand the cell width to make use of this extra space. Right?
And, If you don’t want to change your default settings, you only want to change the width of the current notebook you’re working on, you can enter the following into a cell:
from IPython.core.display import display, HTMLdisplay(HTML("<style>.container { width:100% !important; }</style>"))
Change the Jupyter start-up folder
If you are annoyed by the notebook’s default start-up folder, you manually go to the respective folder to open it. You can change the setting of the start-up folder to open the folder of your choice.
## Open cmd (or Anaconda Prompt) and run > jupyter notebook --generate-config Writing default config to C:\Users\yoges\.jupyter\jupyter_notebook_config.py
Now, browse to the file location and open it in an Editor.
Search for the following line in the file: #c.NotebookApp.notebook_dir = ""
Replace by c.NotebookApp.notebook_dir = ‘/the/path/to/home/folder/’
Make sure you use forward slashes in your path and use /home/user/ instead of ~/ for your home directory, backslashes could be used if placed in double quotes even if the folder name contains spaces as such: “D:\yourUserName\Any Folder\More Folders\”
Remove the # at the beginning of the line to allow the line to execute.
Alternative:
For recent nbclassic and JupyterLab>=3 use c.ServerApp.root_dir instead of c.NotebookApp.notebook_dir
Version Controlling of Jupyter Notebooks
As for any software code, Git is an excellent VCS. Fortunately, there is a tool developed by the Jupyter community to take care of version control in Jupyter notebooks. It is called nbdime and can be easily integrated into Git. For more, it is suggested to go through its documentation.
Changing default browser
Let there be any reason you do not want to use the default browser to open the Jupyter notebooks.
Get the path of the file jupyter_notebook_config.py by typing the following command and opening it.
> jupyter notebook — generate-config
and change # c.NotebookApp.browser = “” to, for example c.NotebookApp.browser = ‘/usr/bin/google-chrome %s’
You can choose the browser of your choice. You’ll find the path for example, by typing which firefox Also, Do not forget to delete the #.
Disable Warnings in Jupyter Notebook
If you are confident about your code and want to remove all warnings from the notebook, you can do so by using the following code.
import warnings
warnings.filterwarnings('ignore')
Wrapping Code/Text on Jupyter Notebooks
Find your configuration directory using the following command
> jupyter --config-dir C:\Users\yoges\.jupyter
Then edit or create nbconfig/notebook.json to add the following:
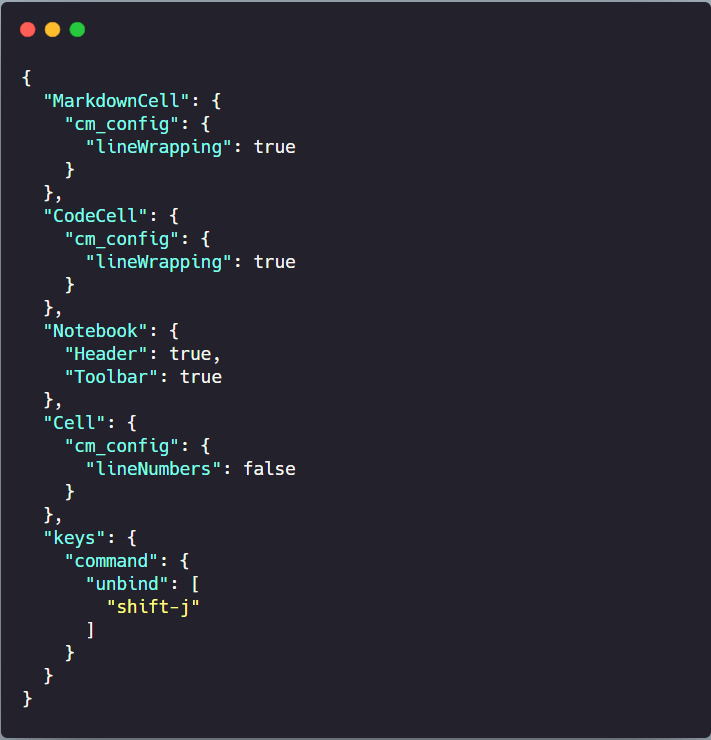
"MarkdownCell": { "cm_config": { "lineWrapping": true } }, "CodeCell": { "cm_config": { "lineWrapping": true } }
The final JSON file looks something like this.
Restart Jupyter and reload your notebook to see the changes.
The Jupyter Notebook is great for not just studying and teaching a programming language like Python and many more but also for sharing your code or data.
You may make your Notebook into a slideshow or publish it on GitHub. With over 1.8 million public notebooks on GitHub as of early 2018, it is without a doubt the most popular independent platform for sharing Jupyter projects with the rest of the world. On its website, GitHub has incorporated functionality for direct rendering.ipynb files in repositories and gists. Otherwise, Binder is a great way to share a Notebook without asking your users to install anything.
As usual, testing a new piece of software on your own is always advisable to determine if it is suitable for you and worth utilizing. We would recommend trying out Jupyter Notebook or JupyterLab and sharing your experience in the comments.
If you like what we do and want to know more about our community 👥 then please consider sharing, following, and joining it. It is completely FREE.
Also, don’t forget to show your love ❤️ by clapping 👏 for this article and let us know your views 💬 in the comment.
Join here: https://blogs.colearninglounge.com/join-us